|
|
|
|
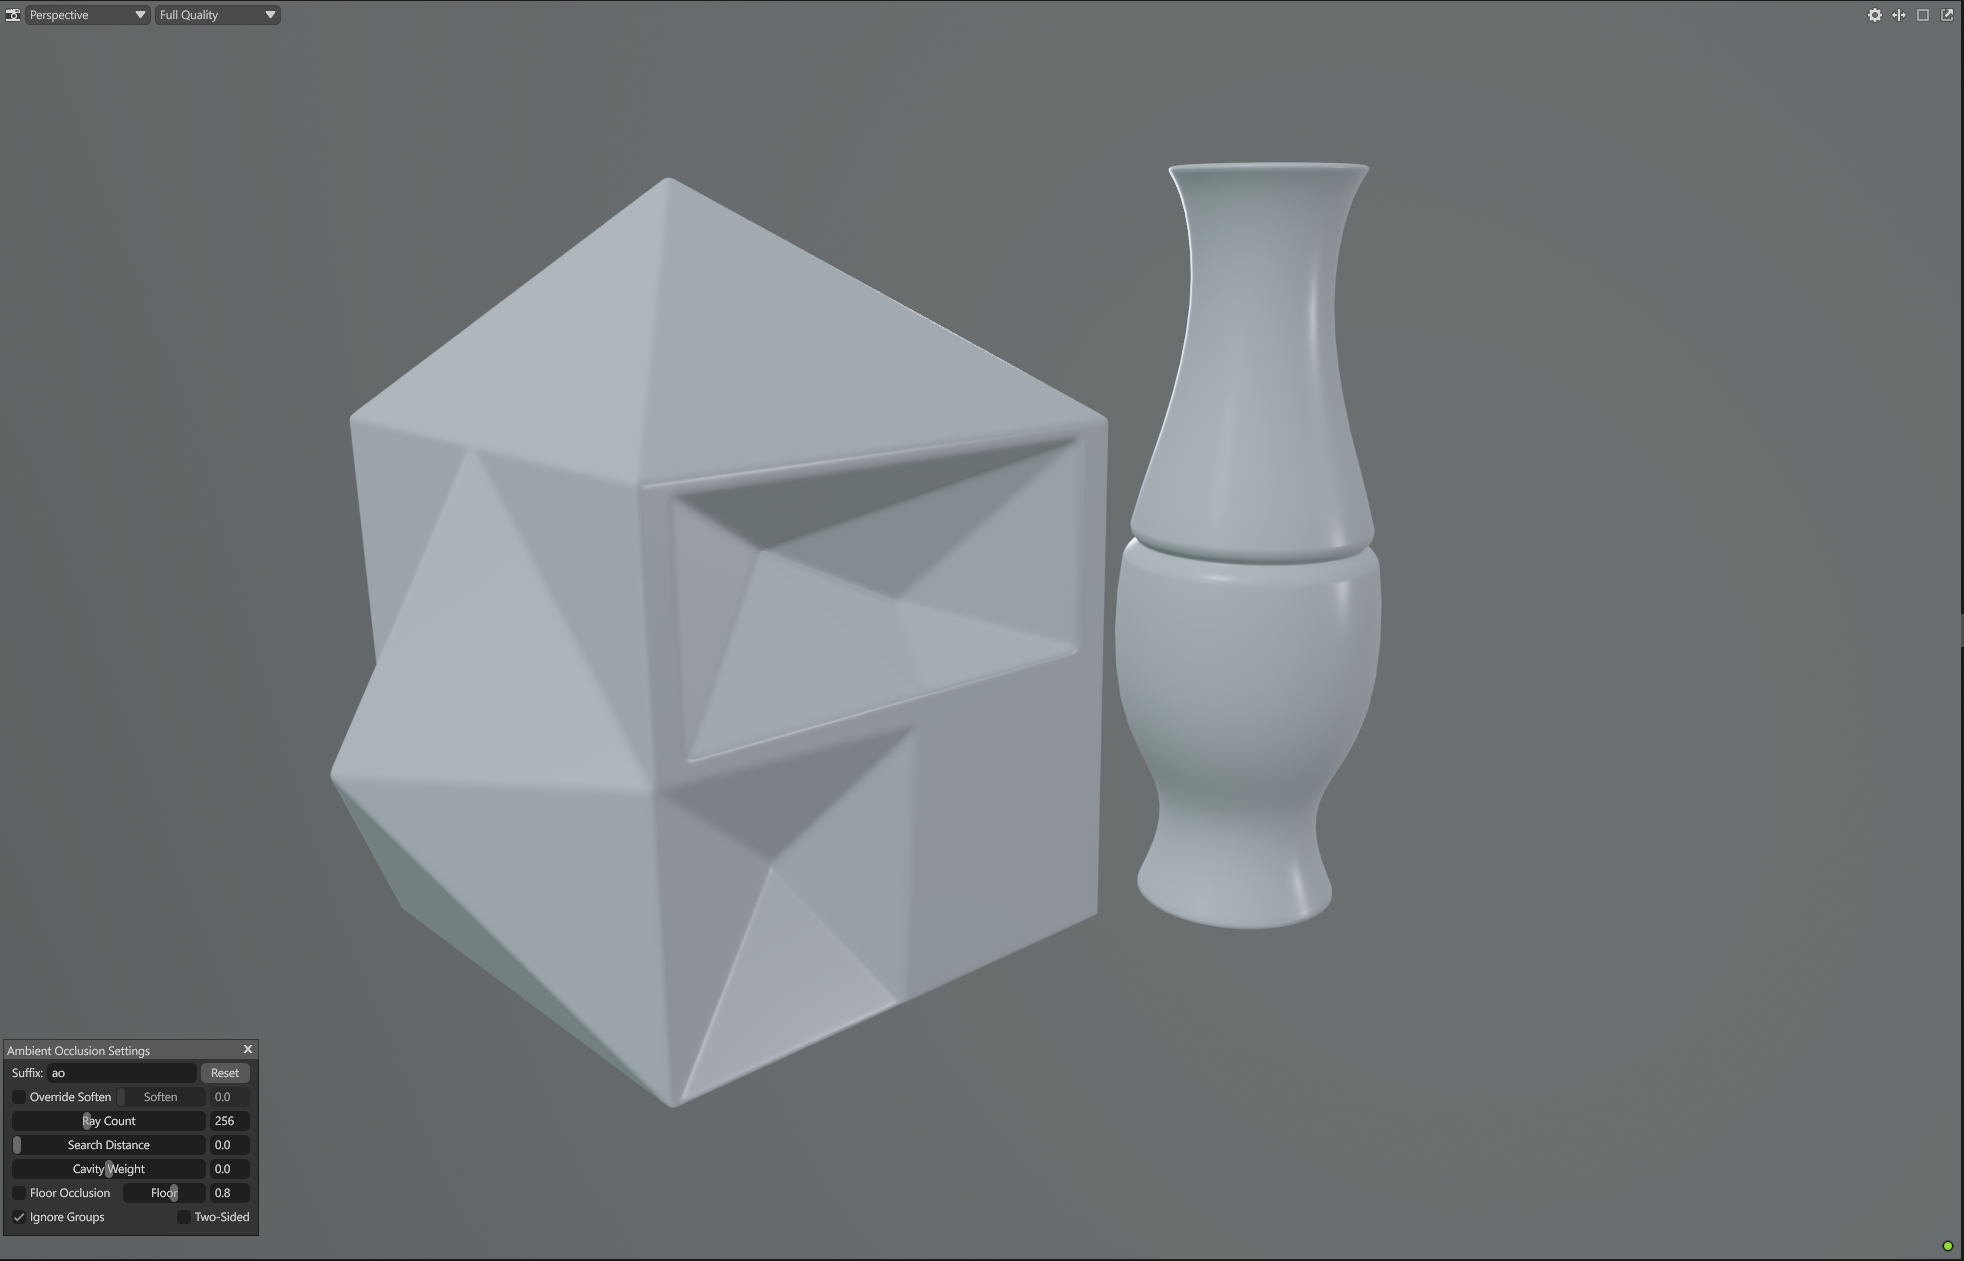
Ambient Occlusion is a shading method used to calculate how exposed a specific point on a surface is to ambient (indirect) light. In the real world, light bounces off surfaces; however, in tight crevices, cavities, or intersections, fewer light rays can reach the surface, creating soft, localized shadows.
Because calculating real-time global illumination is computationally expensive for game engines, we use an AO Map - a grayscale texture that pre-calculates these "micro-shadows" to simulate depth without the performance hit.
In a modern PBR (Physically Based Rendering) workflow, AO maps serve three critical purposes:
During rendering, the engine combines the AO map with the Albedo (BaseColor) or uses it as a separate mask in the shader. Its primary roles are to add depth in uniform lighting, enhance the perception of form and prevent assets from looking "flat" or "floating" in the scene.
For many 3D artists, Marmoset Toolbag is the industry standard for baking due to three main features:
The default settings in any baker are designed to "just work", but they are rarely optimal for specific props. To get a professional result, you must understand how to manipulate the following parameters.
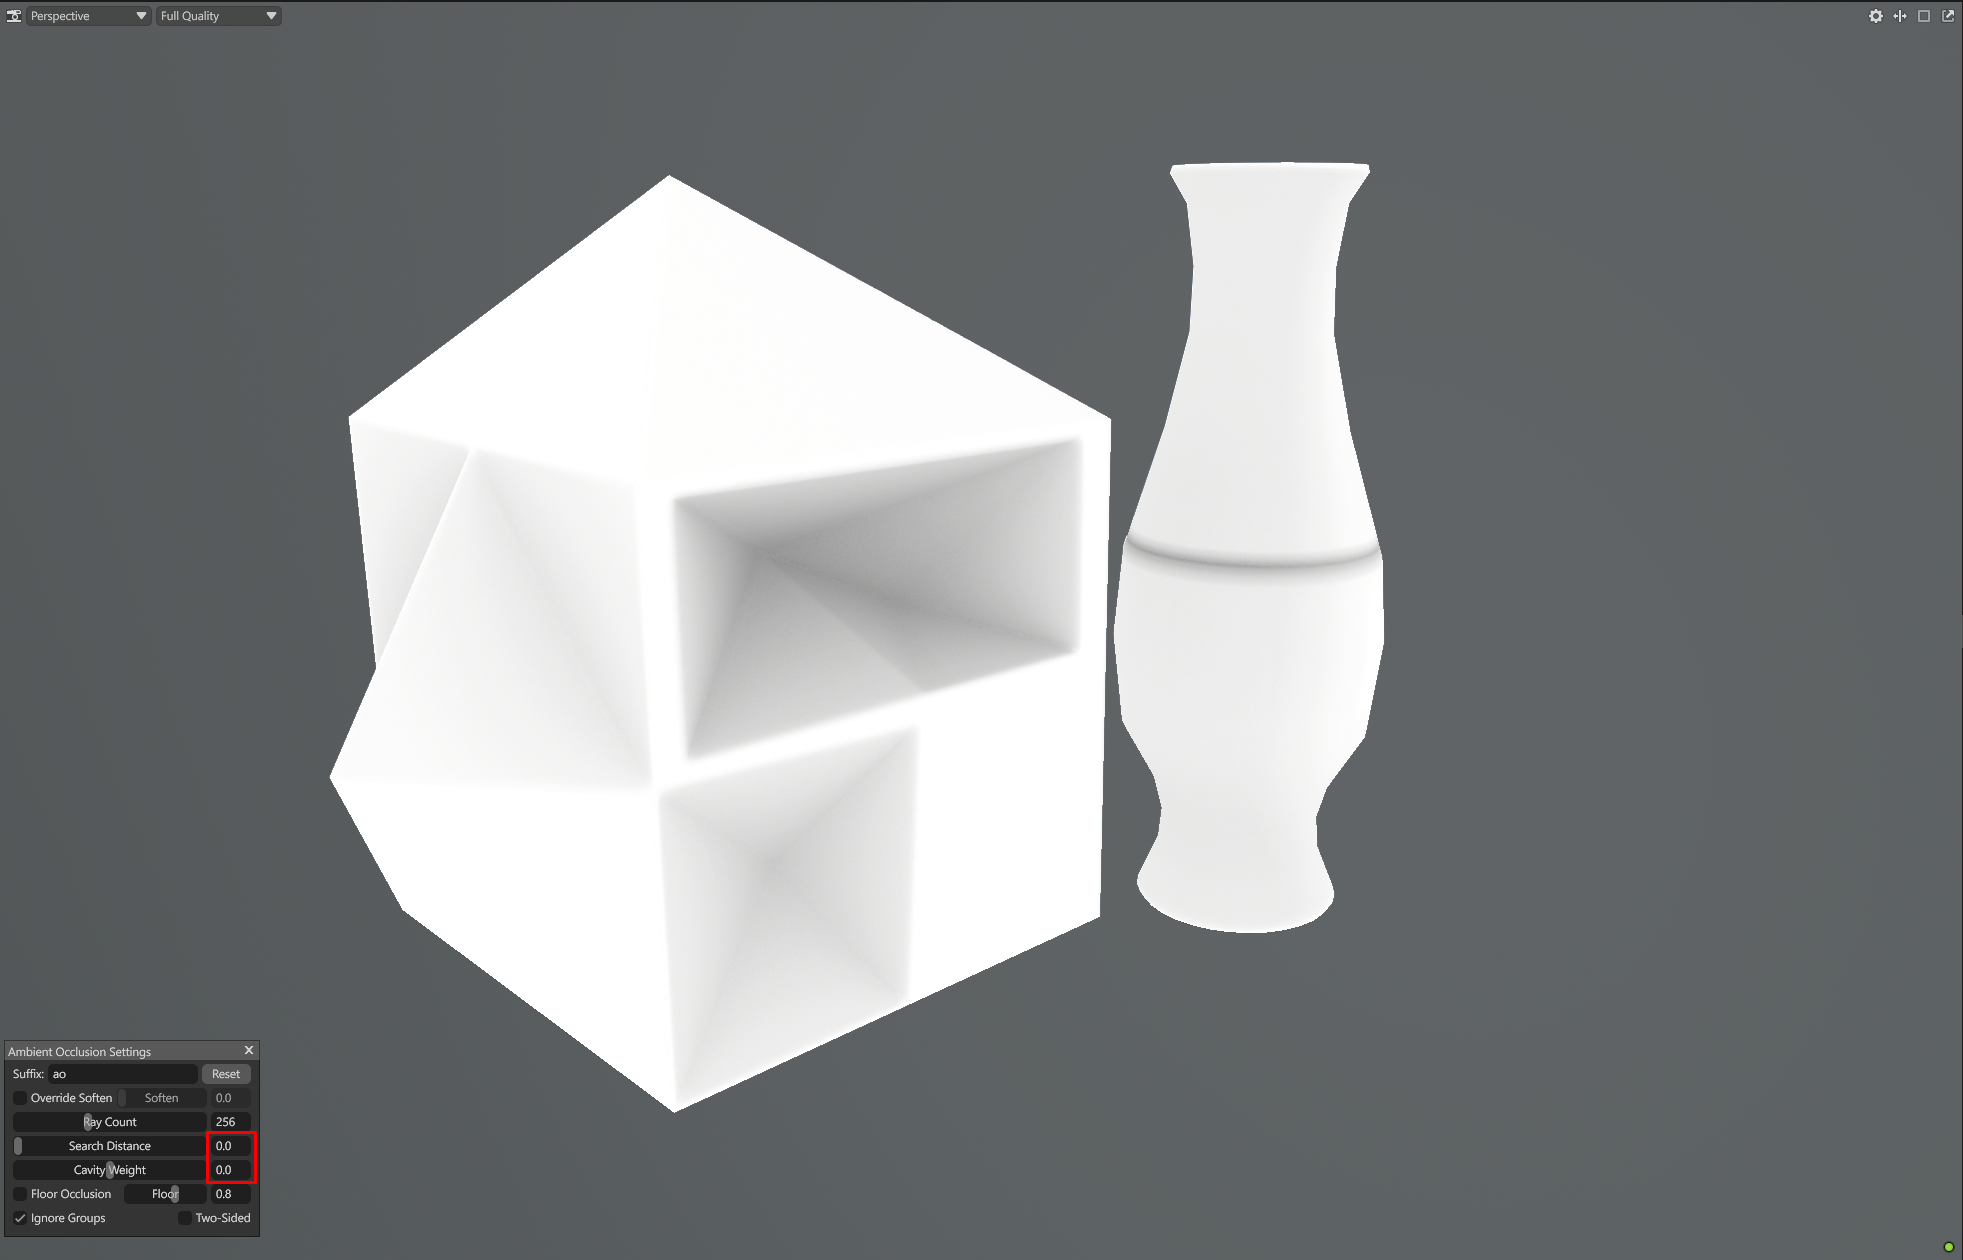
This determines the "cleanliness" of your map.
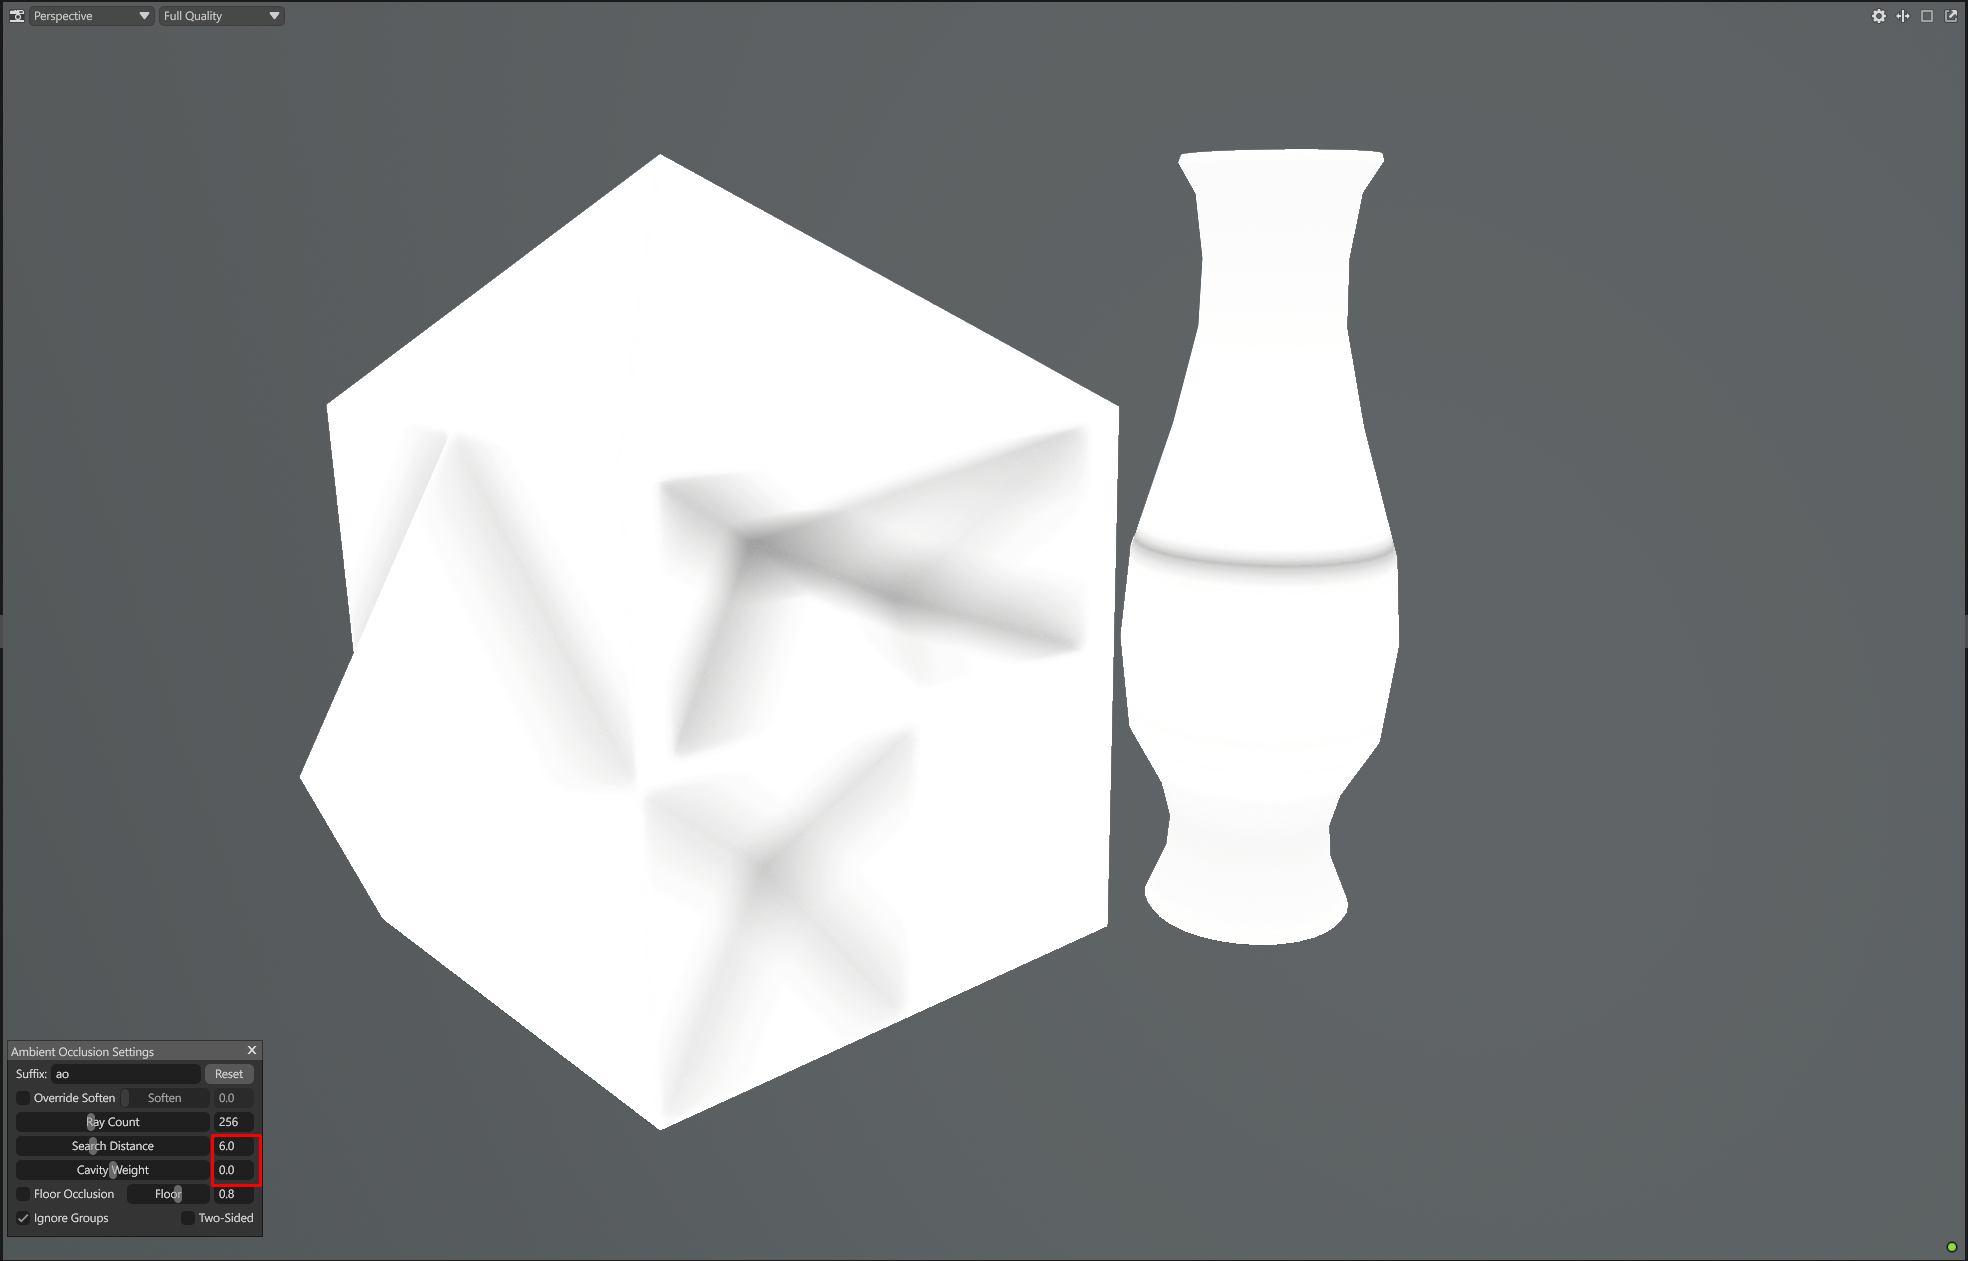
By default, Search Distance is set to 0 (Infinite). This means the baker shoots rays until they hit something, no matter how far away it is. The Problem with Infinite Search Distance (if set to 0) is that rays will travel across the entire surface creating a constant grayscale gradient even on flat areas. This is physically incorrect. In reality, a shadow in a corner should have a "falloff' - it should eventually disappear as the surface becomes exposed.
The Substance Painter Impact:
If your AO map is "too gray" because of an infinite search distance, Substance Painter generators (like Dirt or Dust) will interpret that gray as "occlusion" and spread dirt across large areas. A correct Search Distance ensures that dirt stays localized in the actual crevices.
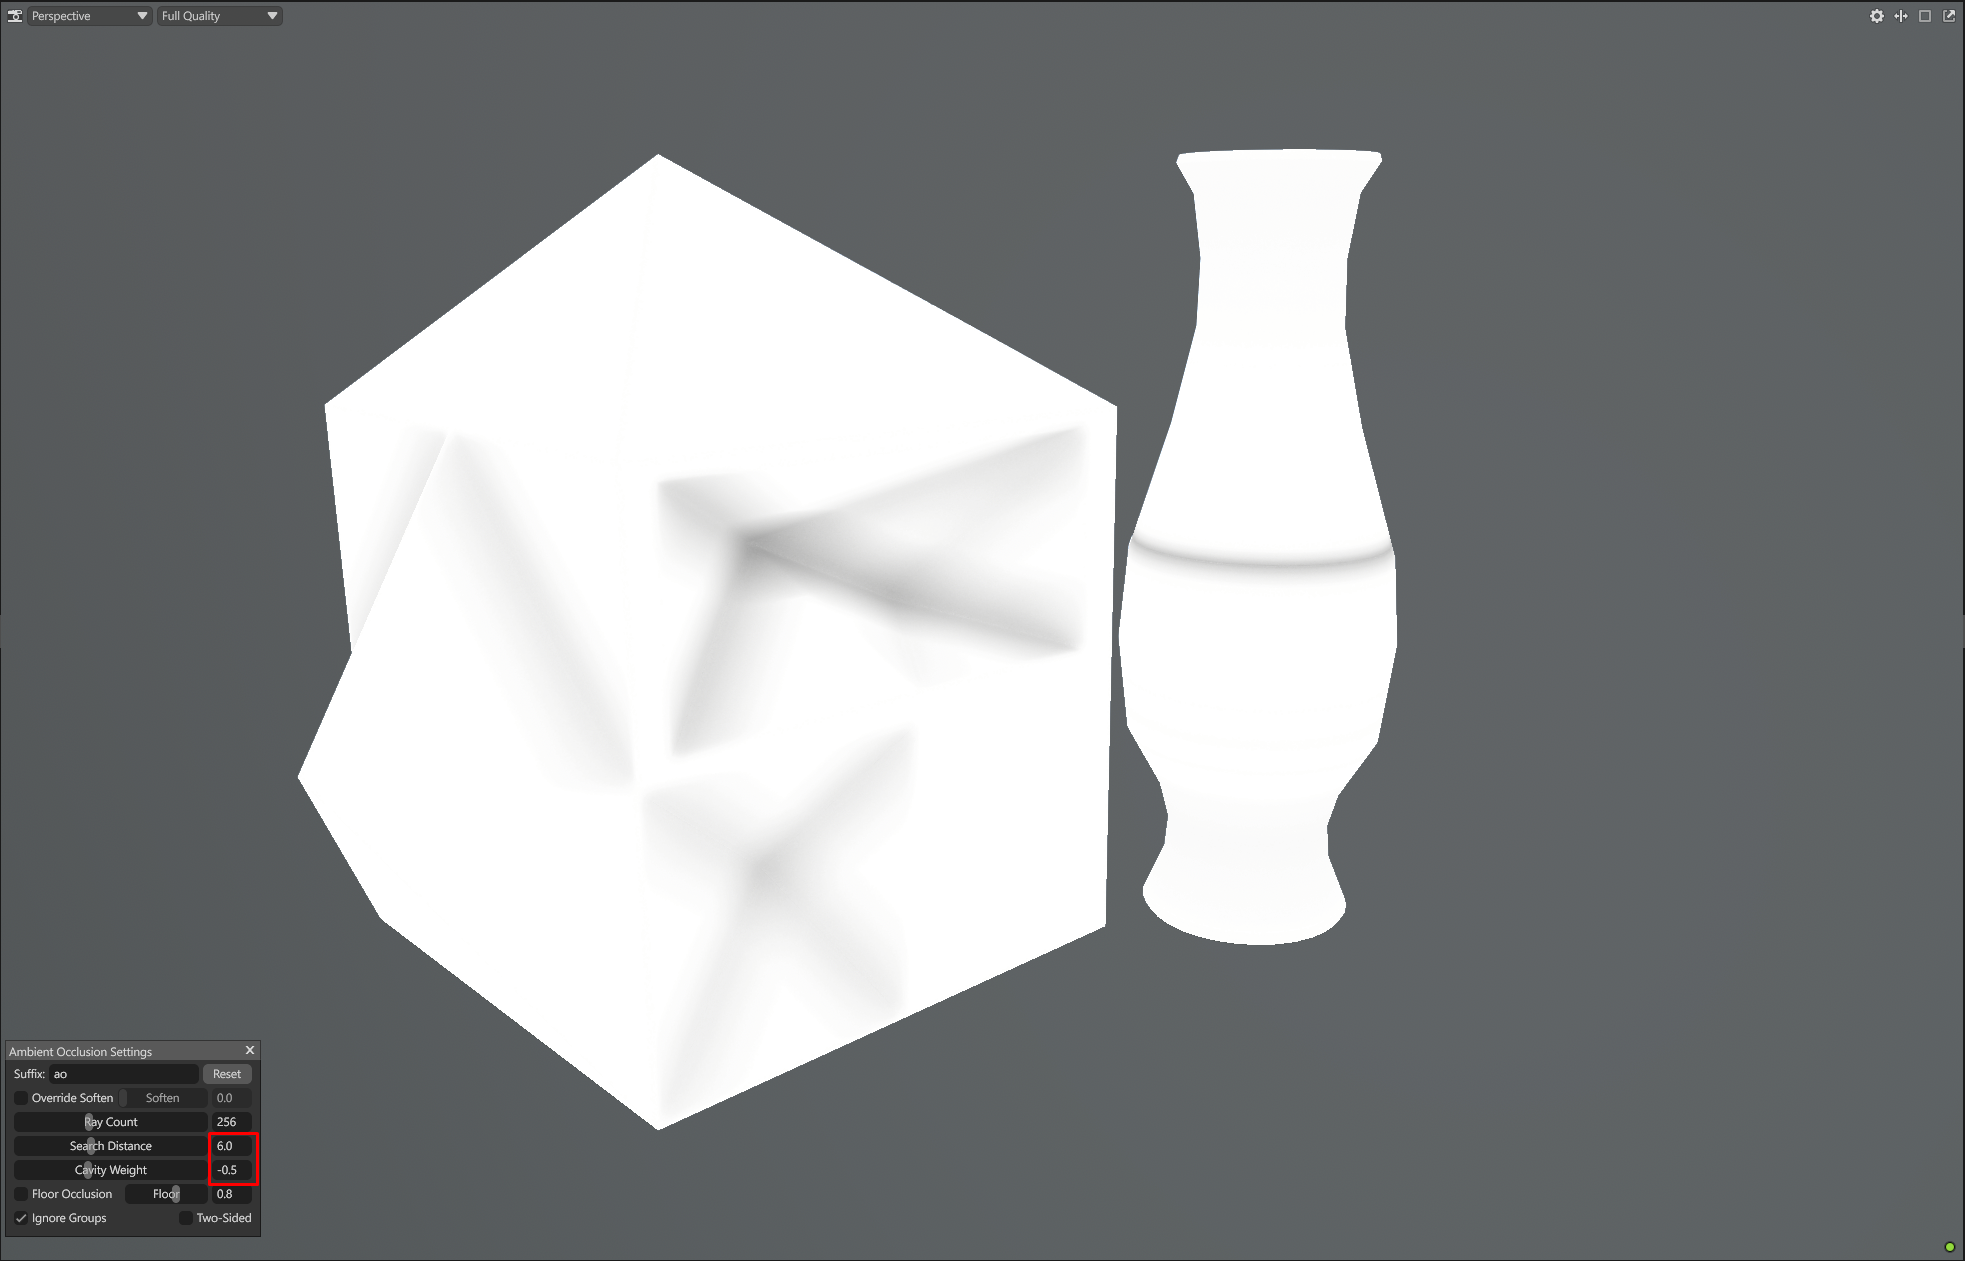
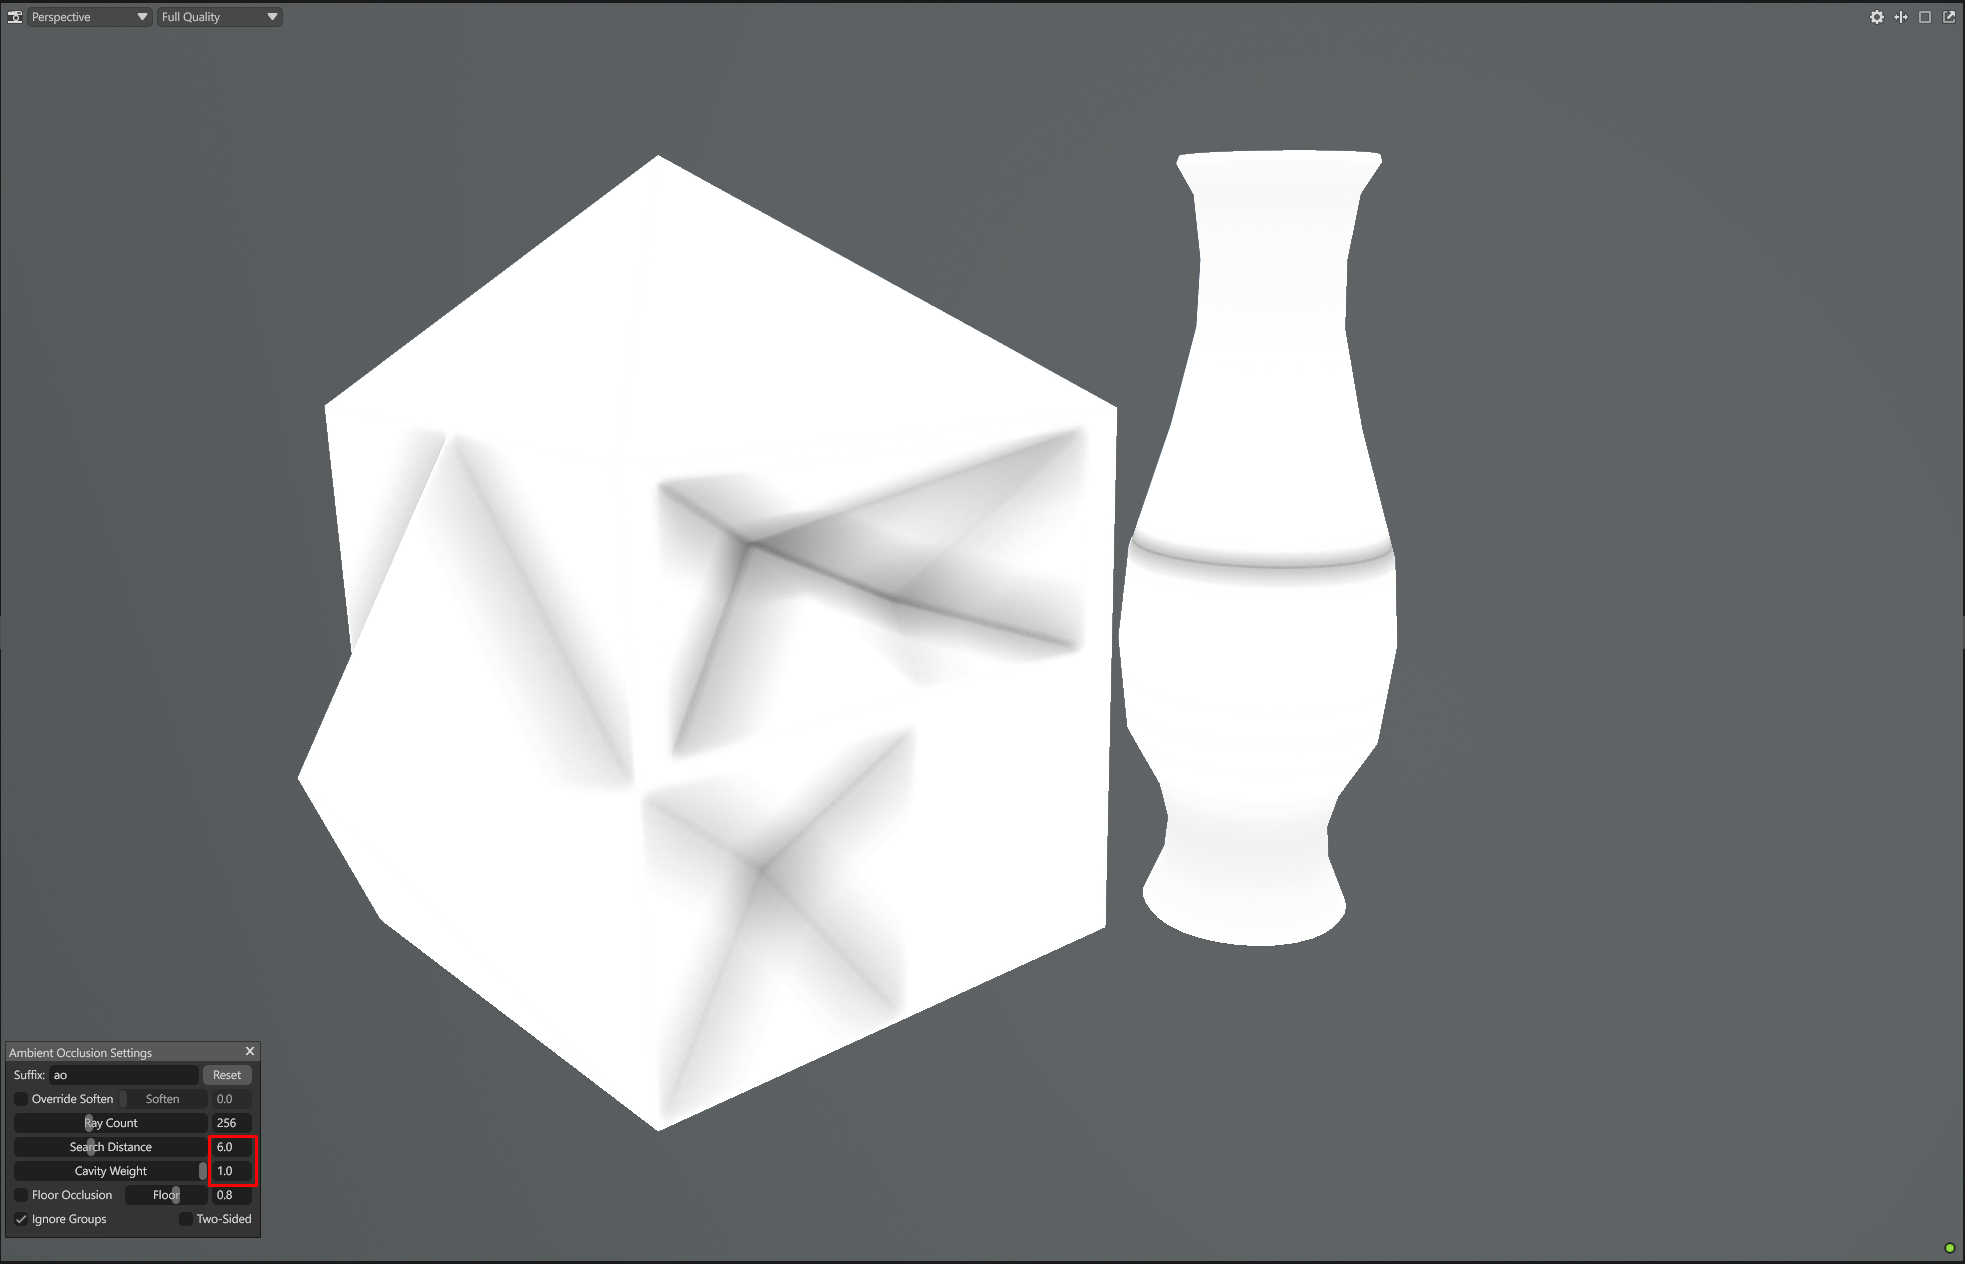
This setting adjusts the bias of the occlusion.
|
Cavity Weight -1 |
Cavity Weight -0.5 |
Cavity Weight 0 |
Cavity Weight 0.5 |
Cavity Weight 1 |

|
|

|
|
|
Adjusting this might help to "tighten" the look of your AO. In most cases 0 is the best value.
To illustrate the importance of Search Distance let's look at the results on a basic shapes:
|
Value |
Image |
Result |
Verdict
|
|
0 (Default) |

|
Flat surfaces are covered in a soft gray gradient. No "true white" areas. |
Incorrect. Will cause "muddy" textures in Substance Painter.
|
|
10.0 |
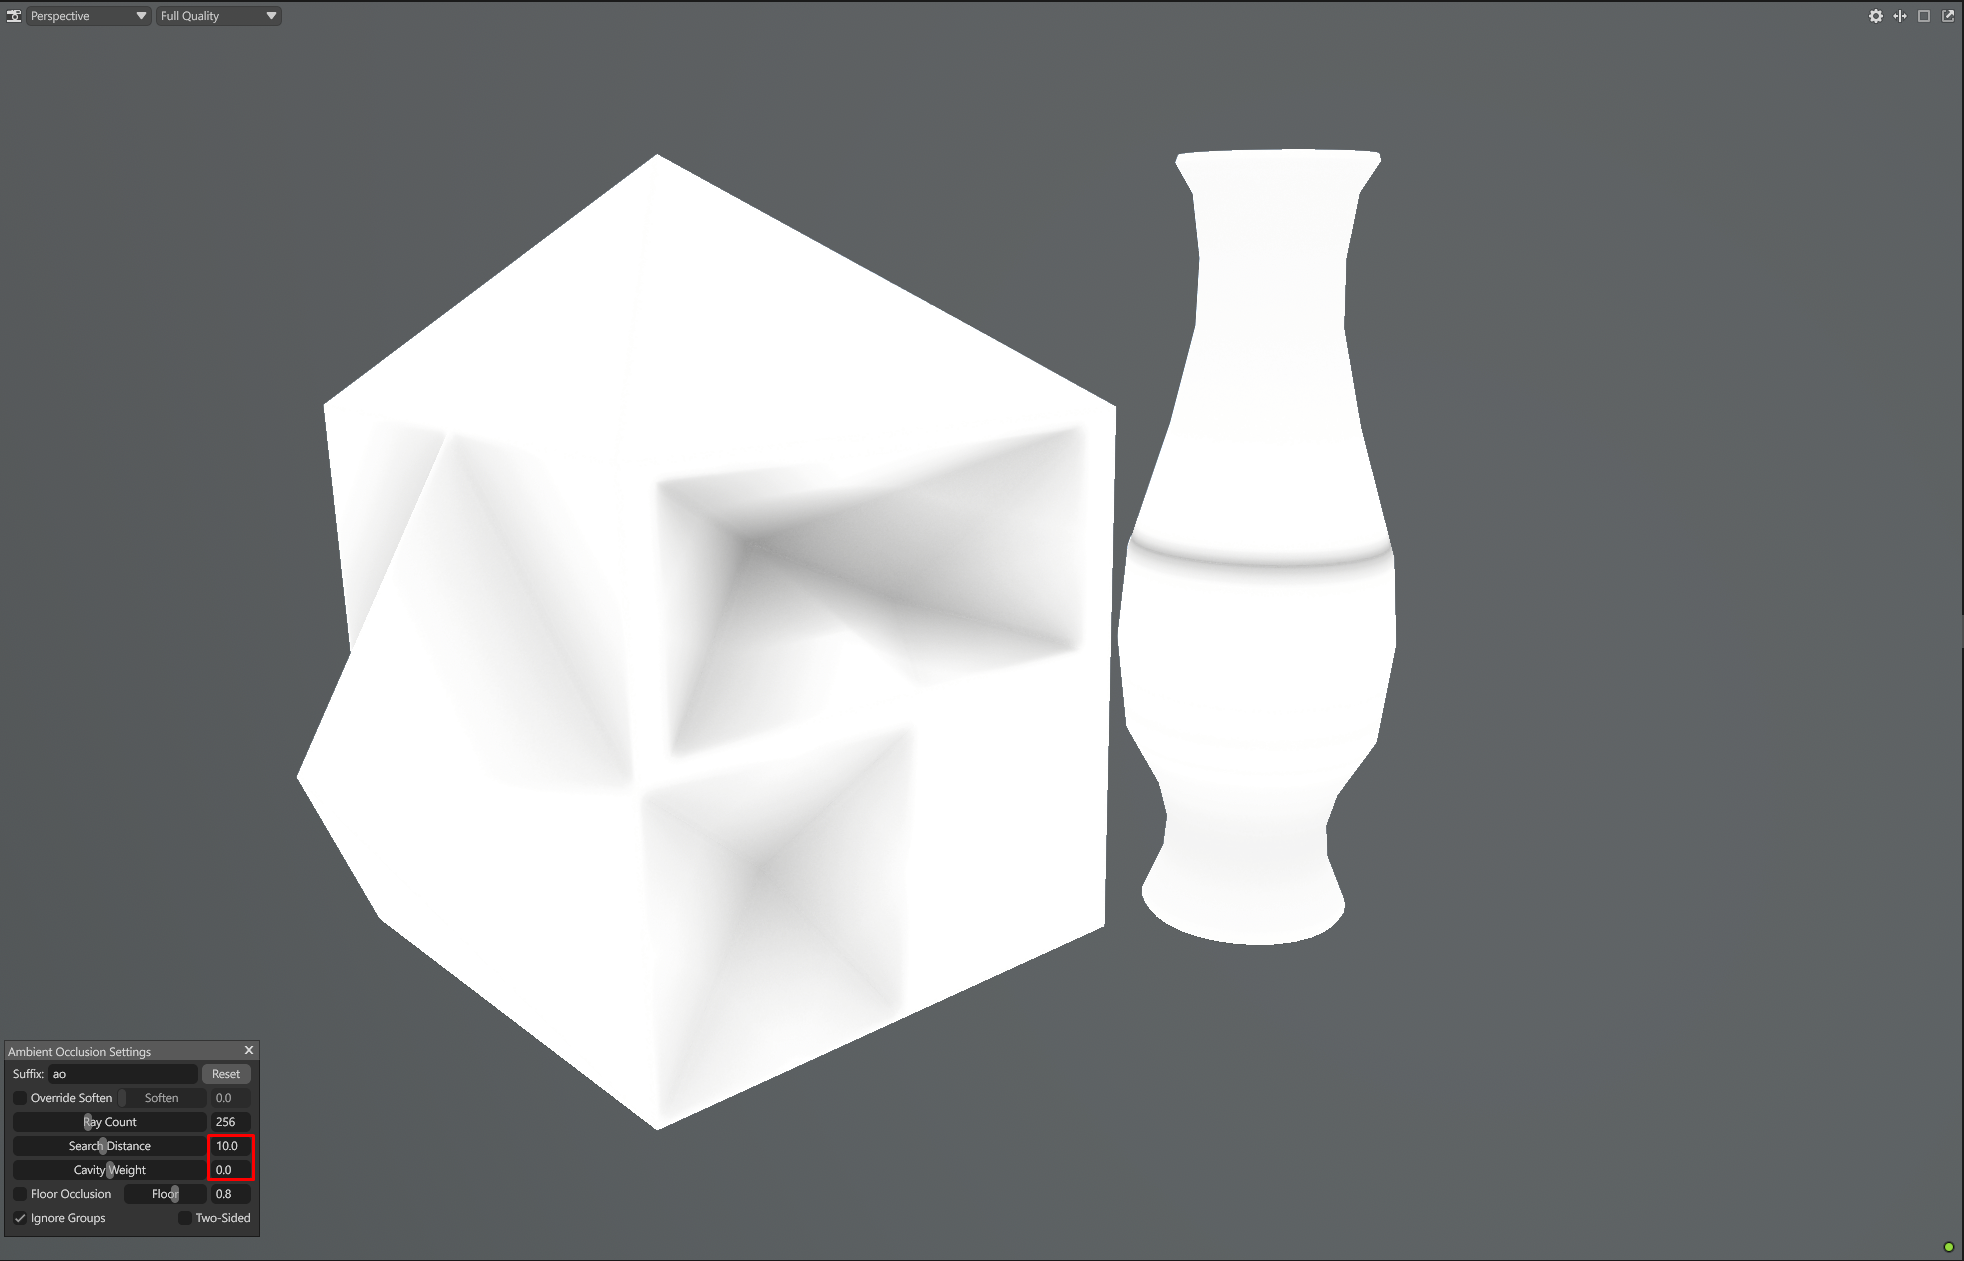
|
Shading is more localized but the falloff is still very wide. |
Better but may still feel "heavy".
|
|
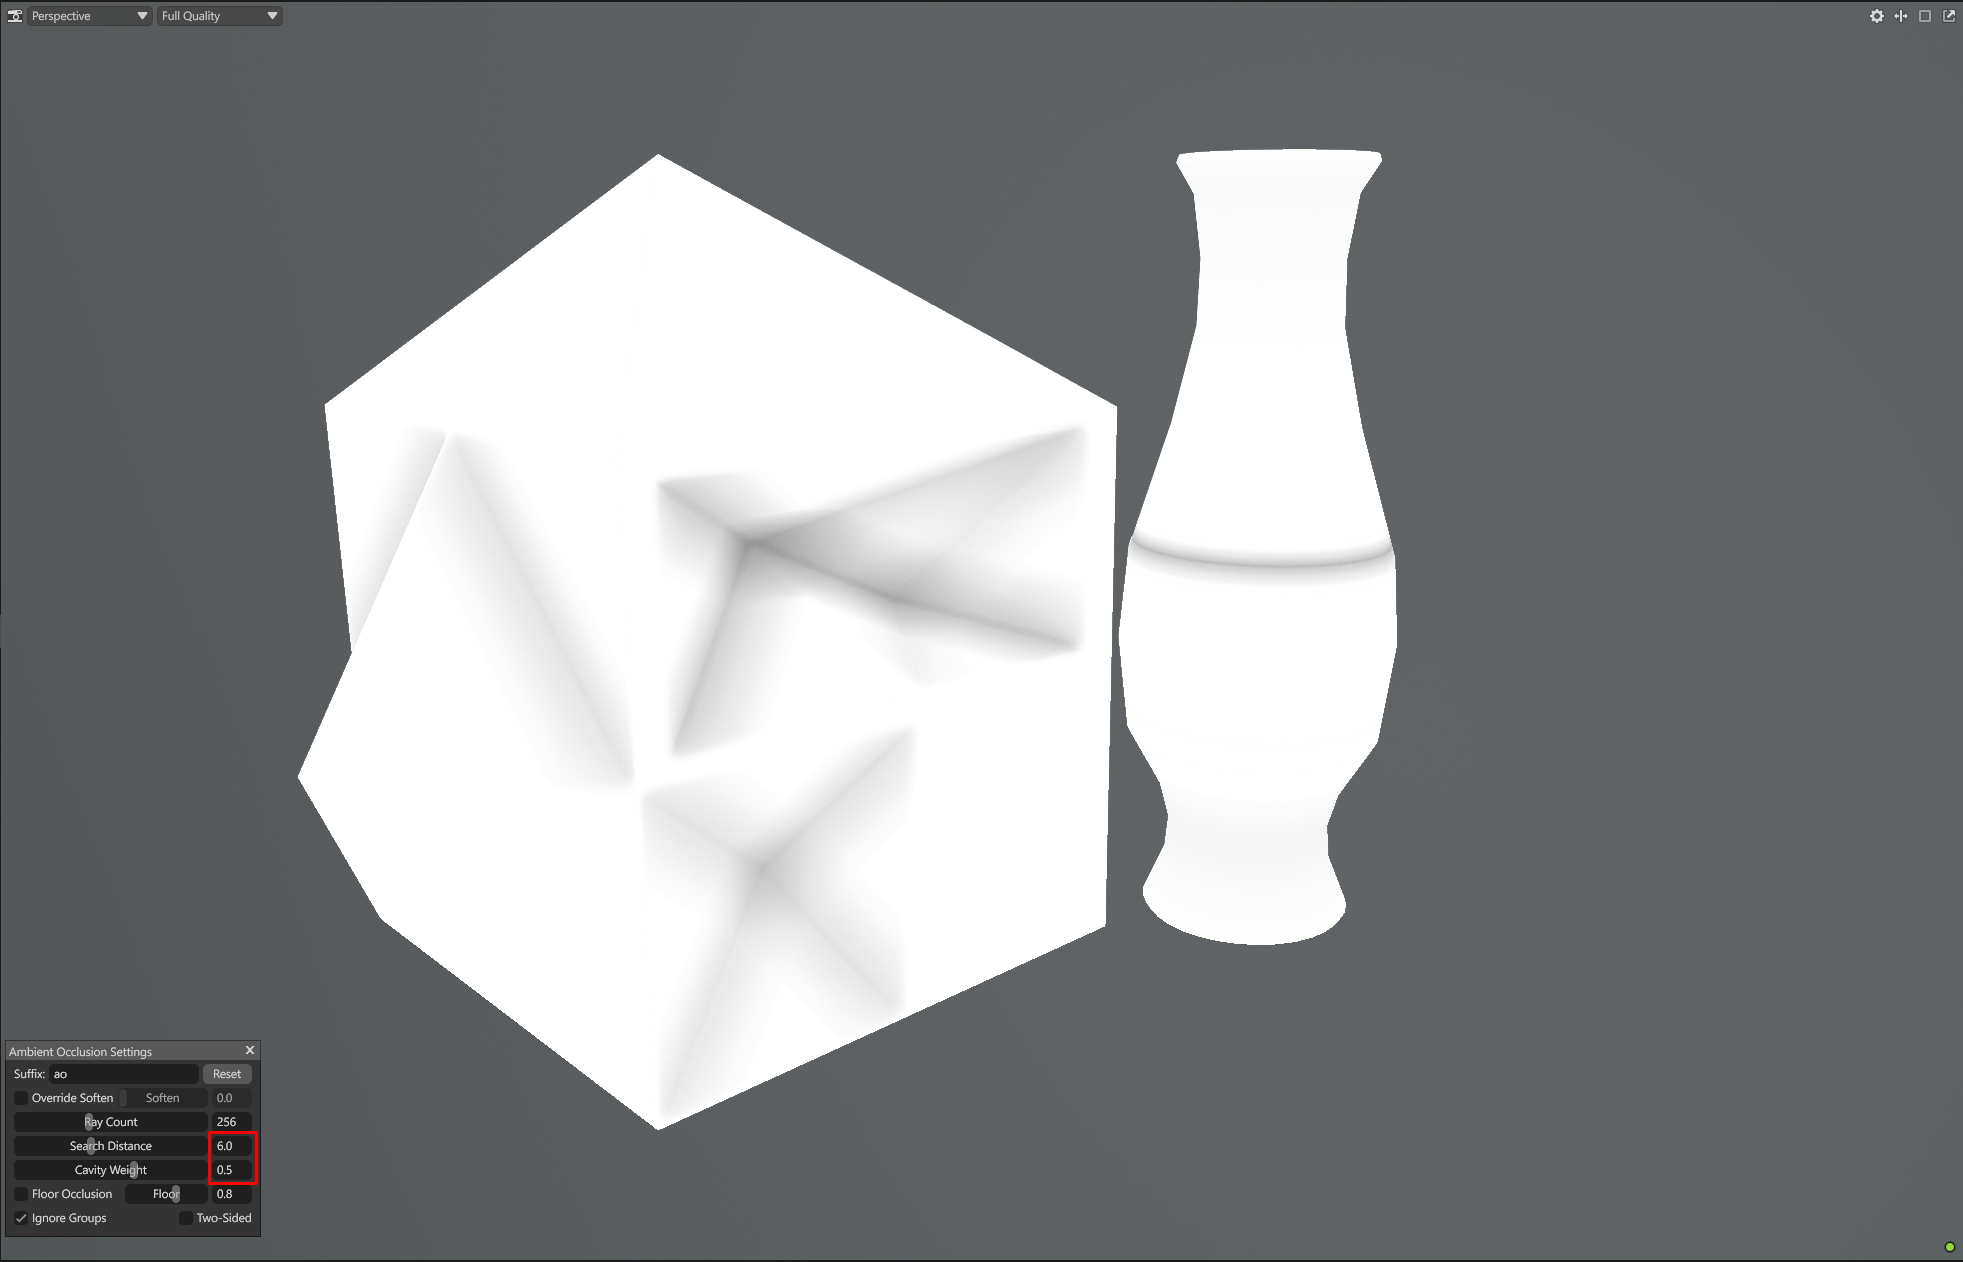
6.0 |

|
Shadows are tight in the corners with a clean transition to white on flat areas. |
Optimal. This provides the most realistic depth and best generator masking.
|
|
1.0 |
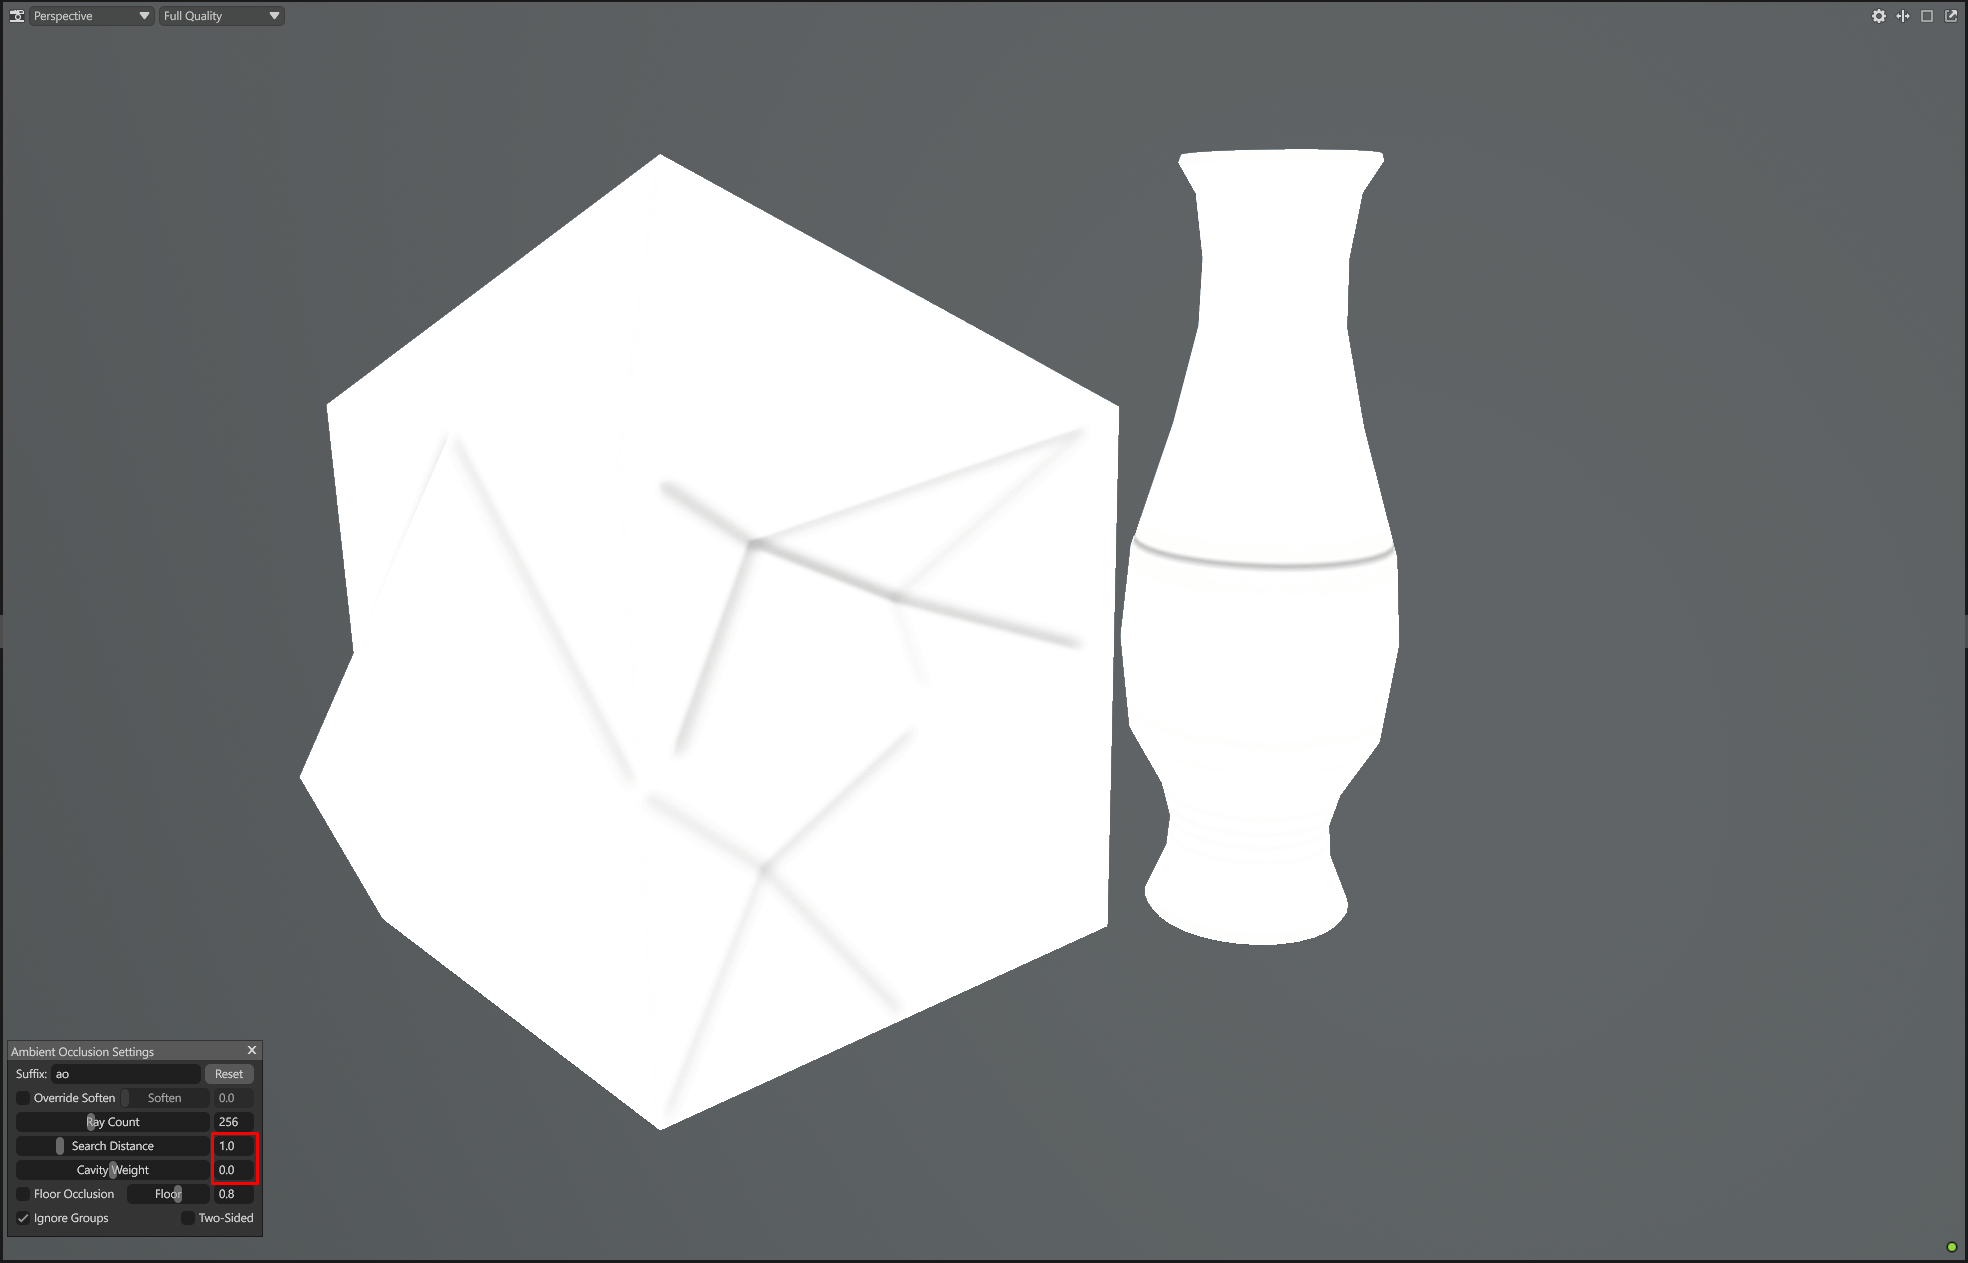
|
Shadows are extremely thin, looking more like a Curvature map. |
Incorrect. Fails to capture the actual volume of the occlusion.
|
There is no "magic number" for AO baking. Large assets might require a Search Distance of 10 or even a bigger value while a very small ones might need 2 or so. Always use the Real-Time Preview in Toolbag 5 while tuning Search Distance value to ensure your flat surfaces are reaching a pure white value and your shadows are only existing where geometry truly meets.